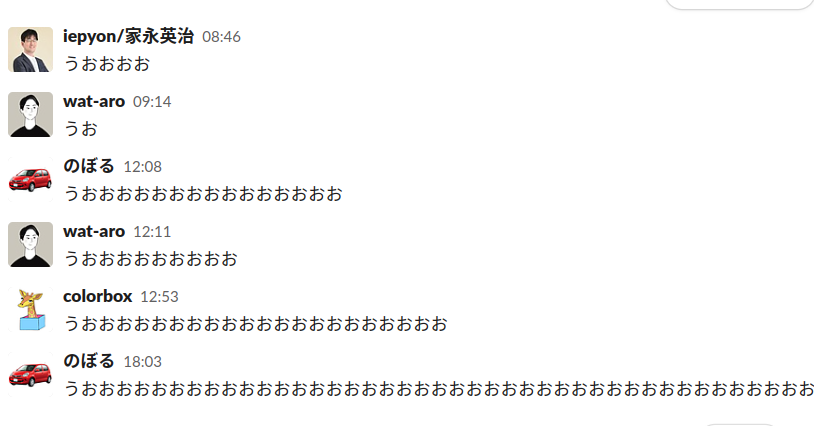
うおおおおおおおおおおおおおおおおおおおおおおおおおお。
子育て奮闘中の @wat-aro です。
この記事は ESM Advent Calendar 2022 - Adventar 19日目の記事です。
ある日 Slack のチャンネル一覧を眺めていると #うおおおおおおおおおおおおお というチャンネルがありました。
みんなで うおおおおおおおおおおおおお しています。

このチャンネル見つけてから毎日 うおおおおおおおおおおおおお しているわけですが、もっと うおおおおおおおおおおおおお したいわけです。
そんなわけで うおおおおおおおおおおおおお するプログラミング言語をつくりましょう。
繰り返し同じ言葉を使えるような言語であればたくさん うおおおおおおおおおおおおお できます。
そうですね。 Brainf**k*1 ですね。
Brainf**k での Hello World! を以下に書いてみます。
>+++++++++[<++++++++>-]<.
>+++++++[<++++>-]<+.
+++++++..
+++.
[-]>++++++++[<++++>-]<.
>+++++++++++[<+++++>-]<.
>++++++++[<+++>-]<.
+++.
------.
--------.
[-]>++++++++[<++++>-]<+.
[-]++++++++++.
Brainf**k は以下の8つの命令のみを持つプログラミング言語です。
| instruction | description | C |
|---|---|---|
| > | Increment pointer | ptr++; |
| < | Decrement pointer | ptr--; |
| + | Increment value | (*ptr)++; |
| - | Decrement value | (*ptr)--; |
| . | Print character | putchar(*ptr); |
| , | Read caracter | *p = getchar(); |
| [ | loop | while(*ptr) { |
| ] | } |
これをまず Rust で実装してみます。
ソースコード全体はこちら
GitHub - wat-aro/uooooo: うおおおおおおおおおおおおおおおお
ランタイム用の構造体はこのようにしました。
#[derive(Debug)]
struct Machine {
    instructions: Vec<Instruction>,
    pc: usize,
    current: usize,
    memory: [u8; 256],
    stack: Vec<usize>,
}
- 現在の命令列の位置を持つ
pc(program counter) - 現在のポインタの位置を表す
current - 256バイトの
memory - ループの際の戻りアドレスを保持する
stack
この構造体を初期化するためファイルから読み取った文字列を命令列に変換します。
fn parse(input: &str) -> Vec<Instruction> {
    let mut instructions = Vec::new();

    for c in input.chars() {
        match c {
            '>' => instructions.push(NextPtr),
            '<' => instructions.push(PrevPtr),
            '+' => instructions.push(Increment),
            '-' => instructions.push(Decrement),
            '.' => instructions.push(Print),
            ',' => instructions.push(Read),
            '[' => instructions.push(Begin),
            ']' => instructions.push(End),
            _ => {}
        }
    }

    instructions
}
そして命令を処理していくわけです。
まずはポインタの加減からです。
match instruction {
    NextPtr => {
        self.current += 1;
        if self.current > 255 {
            return Err(PointerAccessViolation(self.current as isize));
        }
        self.pc += 1;
    }
    PrevPtr => {
        if self.current == 0 {
            return Err(PointerAccessViolation(-1));
        }
        self.current -= 1;
        self.pc += 1;
    }
    ...
}
メモリの範囲を越えてパニックしないようにチェックしてあげます。
次に値の加減を追加します。
match instruction {
    ...
    Increment => {
        if let Some(x) = self.memory.get_mut(self.current) {
            *x = x.wrapping_add(1);
        }
        self.pc += 1;
    }
    Decrement => {
        if let Some(x) = self.memory.get_mut(self.current) {
            *x = x.wrapping_sub(1);
        }
        self.pc += 1;
    }
    ...
}
値は 8 ビット符号なし整数 ですが、桁溢れを無視するようにしています。
つまり 255 + 1 = 0 です。
入出力については1文字ずつになります.
標準ライブラリに1文字の入力のみをうけつける関数がなかったため、 libc を使用しています。
match instruction {
    ...
    Print => match char::from_u32(self.current_value() as u32) {
        Some(c) => {
            print!("{}", c);
            self.pc += 1;
        }
        None => return Err(InvalidChar(self.current_value())),
    },
    Read => {
        if let Some(x) = self.memory.get_mut(self.current) {
            *x = getchar();
            self.pc += 1;
        }
    }
    ...
}

fn getchar() -> u8 {
    unsafe { libc::getchar() as u8 }
}
最後にループです。
ループでは開始位置にジャンプする必要があるため Begin で stack に開始位置を push しておくようにしました。
そして、現在値が 0 の場合は対応する End まで処理を飛ばします。
match instruction {
    ...
    Begin => {
        if self.current_value() == 0 {
            self.jump_to_end()?;
        } else {
            self.stack.push(self.pc);
            self.pc += 1;
        }
    }
    End => match self.stack.pop() {
        Some(address) => {
            self.pc = address;
        }
        None => return Err(UnmatchedBeginEnd),
    },
    ...
}

fn jump_to_end(&mut self) -> Result<(), MachineError> {
    let mut counter = 1;
    while counter != 0 {
        self.pc += 1;
        match self.instructions.get(self.pc) {
            Some(instruction) => match instruction {
                Begin => {
                    counter += 1;
                }
                End => {
                    counter -= 1;
                }
                _ => {}
            },
            None => {
                return Err(UnmatchedBeginEnd);
            }
        }
    }
    self.pc += 1;
    return Ok(());
}
これで実装は完了です。
簡単ですね。
実行すると以下のように Hello World! を出力します。
$ cargo run tests/examples/hello_world.bf
    Finished dev [unoptimized + debuginfo] target(s) in 0.02s
     Running `target/debug/uooooo tests/examples/hello_world.bf`
Hello World!
さて、これで前準備が完了しました。
本題の うおおおおおおおおおおおおお です。
Brainf**kは 8 個の命令があり、 うおおおおおおおおおおおおお は二文字で構成されているため
う と お を 3 文字使えばすべての命令を表すことができます。
しかしそれでは うおおおおおおおおおおおおお の お が続く勢いを表せられません。
できるだけ お が続くようなものということでハフマン符号化*2で命令を表現することにしました。
まずは命令がどれくらい使われているかを調べてみます。
冒頭に書いた Hello world! を tally するとこのようになります。
irb(main):001:0> target.chars.tally
{">"=>12, "+"=>104, "["=>9, "<"=>12, "-"=>23, "]"=>9, "."=>13}
irb(main):002:0> target.chars.tally.sort
[["]", 9], ["[", 9], [">", 12], ["<", 12], [".", 13], ["-", 23], ["+", 104]]
これらを考慮した結果以下のような割り当てにしました。
一番使われている + を おおおおおお に割り当てることで お が続くようにしています。
| instruction | brainf**k | description | C |
|---|---|---|---|
| う | > | Increment pointer | ptr++; |
| おおおう | < | Decrement pointer | ptr--; |
| おおおおおお | + | Increment value | (*ptr)++; |
| おおおおおう | - | Decrement value | (*ptr)--; |
| おおおおう | . | Print character | putchar(*ptr); |
| おう | , | Read caracter | *p = getchar(); |
| おおうう | [ | loop | while(*ptr) { |
| おおうお | ] | } |
Brainf**k を改造して上記命令に対応させましょう。
見た目を変えただけなので parse を変更するだけです。
fn parse(input: &str) -> Vec<Instruction> {
    let mut instructions = Vec::new();

    let mut i = 0;

    while i < input.chars().count() {
        if substring(input, i, 1) == "う" {
            instructions.push(NextPtr);
            i += 1;
        } else if substring(input, i, 2) == "おう" {
            instructions.push(Read);
            i += 2;
        } else if substring(input, i, 4) == "おおうう" {
            instructions.push(Begin);
            i += 4;
        } else if substring(input, i, 4) == "おおうお" {
            instructions.push(End);
            i += 4;
        } else if substring(input, i, 4) == "おおおう" {
            instructions.push(PrevPtr);
            i += 4;
        } else if substring(input, i, 5) == "おおおおう" {
            instructions.push(Print);
            i += 5;
        } else if substring(input, i, 6) == "おおおおおう" {
            instructions.push(Decrement);
            i += 6;
        } else if substring(input, i, 6) == "おおおおおお" {
            instructions.push(Increment);
            i += 6;
        } else {
            i += 1;
        }
    }

    instructions
}

fn substring<'a>(input: &'a str, begin: usize, len: usize) -> String {
    input.chars().skip(begin).take(len).collect::<String>()
}
ascii ではない文字列にスライスを使うと分割が面倒なため別途 substring 関数を用意して比較するようにしています。
これで Hello World! を試してみましょう。
うおおおおおおおおおおおおおおおおおおおおおおおおおおおおおおおおおおおおおおおおおおおおおおおおおおおおおおおおううおおおうおおおおおおおおおおおおおおおおおおおおおおおおおおおおおおおおおおおおおおおおおおおおおおおおうおおおおおうおおうおおおおうおおおおう
うおおおおおおおおおおおおおおおおおおおおおおおおおおおおおおおおおおおおおおおおおおおおううおおおうおおおおおおおおおおおおおおおおおおおおおおおおうおおおおおうおおうおおおおうおおおおおおおおおおう
おおおおおおおおおおおおおおおおおおおおおおおおおおおおおおおおおおおおおおおおおおおおおおうおおおおう
おおおおおおおおおおおおおおおおおおおおおおう
おおううおおおおおうおおうおうおおおおおおおおおおおおおおおおおおおおおおおおおおおおおおおおおおおおおおおおおおおおおおおおおおううおおおうおおおおおおおおおおおおおおおおおおおおおおおおうおおおおおうおおうおおおおうおおおおう
うおおおおおおおおおおおおおおおおおおおおおおおおおおおおおおおおおおおおおおおおおおおおおおおおおおおおおおおおおおおおおおおおおおおおううおおおうおおおおおおおおおおおおおおおおおおおおおおおおおおおおおおうおおおおおうおおうおおおおうおおおおう
うおおおおおおおおおおおおおおおおおおおおおおおおおおおおおおおおおおおおおおおおおおおおおおおおおおううおおおうおおおおおおおおおおおおおおおおおおうおおおおおうおおうおおおおうおおおおう
おおおおおおおおおおおおおおおおおおおおおおう
おおおおおうおおおおおうおおおおおうおおおおおうおおおおおうおおおおおうおおおおう
おおおおおうおおおおおうおおおおおうおおおおおうおおおおおうおおおおおうおおおおおうおおおおおうおおおおう
おおううおおおおおうおおうおうおおおおおおおおおおおおおおおおおおおおおおおおおおおおおおおおおおおおおおおおおおおおおおおおおおううおおおうおおおおおおおおおおおおおおおおおおおおおおおおうおおおおおうおおうおおおおうおおおおおおおおおおう
おおううおおおおおうおおうおおおおおおおおおおおおおおおおおおおおおおおおおおおおおおおおおおおおおおおおおおおおおおおおおおおおおおおおおおおおおおおおおう
とても勢いのある うおおおおおおおおおおおおお になっています。
これを実行すると
cargo run tests/examples/hello_world.uooooo
    Finished dev [unoptimized + debuginfo] target(s) in 0.01s
     Running `target/debug/uooooo tests/examples/hello_world.uooooo`
Hello World!
無事出力できました。
これでどんどん うおおおおおおおおおおおおお できますね!
それではみなさまよい うおおおおおおおおおおおおお ライフを!